Category: Know-How

on

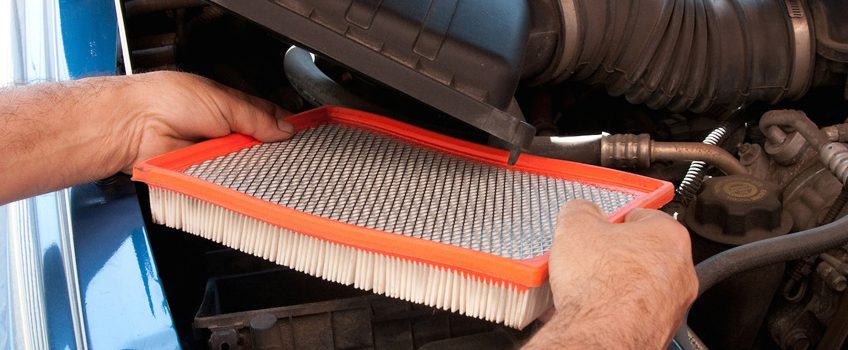
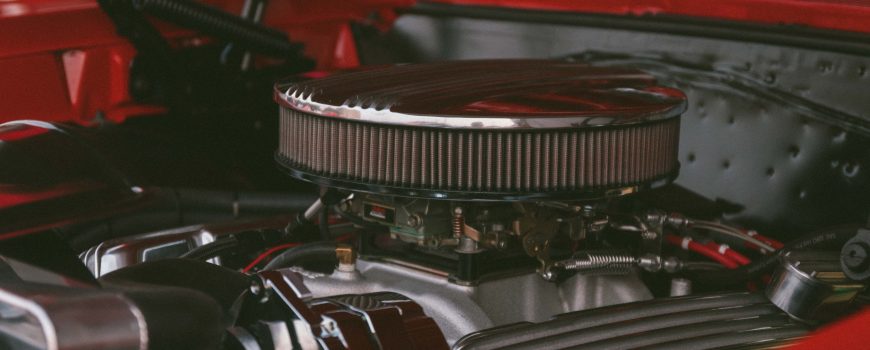
The benefits of automotive oil aren’t exactly obvious. Why is your car’s engine so dependent on it? Why are there are so many kinds staring back at you from the shelf? The answers don’t have to be complicated. The fact is, your engine’s oil is one of its most important components. Check out these key benefits of automotive oil.

Friction

The number one job of the oil in your engine is to reduce the friction between its internal moving parts as much as possible. A thin layer of oil coats all the metal inside your car’s motor and ensures that even with the close tolerances found in a modern automobile, there’s never any contact between a piston and a cylinder wall, or any of its bearings. The lubricant is pumped under pressure throughout the engine, where it forms an oil wedge that moves in response to that pressure. It’s more complicated than just dousing parts in oil and calling it a day, but the overall effect is to dramatically reduce wear and tear.

Keep Out Corrosion

Most metals don’t react well to exposure to the atmosphere and, as such, require a coating to prevent them from becoming corroded. Another benefit of engine oil is to stop rust and oxidation from forming inside your engine. While it might seem strange to worry about a rusty motor, consider that an engine is not a closed system — it takes in air and fuel from the outside world, each of which could be further laced with impurities. Add in the high internal temperatures found in automobile motors and you have a recipe for corrosion.

Heat and Deposits

Heat can be damaging in ways other than simply offering an accelerator for rust and other types of corrosion. High combustion temperatures inside your motor combined with the above-mentioned impurities often mean that deposits from fuel being burned in each cylinder are left behind with every stroke. Adding to the benefits of engine oil is the additives pack that is included with most modern lubricants, chemicals that are intended to sweep these deposits away before they can build up to the point where they interfere with the efficiency of your engine. Different types of oil can have different additive packs, too, which is why it’s important to use what your vehicle’s manufacturer recommends in the owner’s manual.

It’s important to understand why oil is a crucial part of your vehicle’s mechanical health so that you can stay on top of the maintenance that comes with owning a car.

Check out all the chemical products available on NAPA Online or trust one of our 16,000 NAPA AutoCare locations for routine maintenance and repairs. For more information on the benefits of automotive oil, chat with a knowledgeable expert at your local NAPA AUTO PARTS store.

on

How to Replace Wiper Blades

Difficulty: Easy
Duration: 5 minutes
How often: Every 6-12 months

Visibility is extremely important to safe driving. If your current wipers are not wiping well or leaving streaks, change them immediately.

Learning how to replace wiper blades is simple. You may be able to change your wiper blades with no tools. If not, here are the items you may need from your garage or your local NAPA AUTO PARTS Store:

  • New wiper blades (usually packaged with wiper rubber and support structure)
  • Tape measure
  • Small pocket screwdriver
  • Needle-nose pliers
  • Anti-seize compound (optional)

Step 1 – Visit NAPA AUTO PARTS for the correct wiper blade replacement.

Your NAPA AUTO PARTS sales associate can help you find the correct wiper blade replacement for your year, make and model, or you can take one of your old blades in to the store. Some vehicles use different length wiper blades on the driver’s side versus the passenger’s side. For vehicles with a rear wiper, consider changing this blade at the same time.

Step 2 – Pull the wiper arm up and away from the car.

The blade and arm should now be sticking out perpendicular to the window. Some wiper arms will only come up two or three inches from the windshield. If your wiper arm only comes up a small amount, don’t force it. There should be a locking tab at the base of the wiper that will lock it in the raised position.

Step 3 – Match the existing connector to one of the connectors provided with the new blade.

The attachment is where the arm and blade meets. There are several styles of attachments. The three most common are the hook-slot connector, pin-type arm and straight-end connector. Replacement blades typically include a variety of connectors.

  • Hook-slot connector: Swing the blade perpendicular to the arm so you can see the connector. You’ll find a tab at the connector that needs to be lifted or pushed to release the lock that holds the blade pivot in the hook slot. Once the tab is released, a firm shove toward the base of the arm will slide the blade out of the hook slot.
  • Pin-type arm: Raise the arm and examine the locking tab that holds the blade onto the pin. You’ll either have to push the tab up from underneath the blade or lift the tab from the top with a small, flathead screwdriver. Once the tab unlocks the pin, pull the blade assembly with a sideways motion away from the arm. The new unit may simply lock onto the pin, or the new blade may include an adapter that locks into the blade opening and accepts pins in different sizes.
  • Straight-end connector: The straight-end connector can be tricky. Sometimes you need to lift a tab on top of the existing blade with a screwdriver to clear the locking nub on the arm. You may also need to cock the old blade a few degrees out-of-parallel with the arm to slide it off the arm’s end.

Step 4 – Remove the windshield wiper blade from the arm at the attachment.

Depending on the connector type, remove the blade as outlined above. Once the old blade is off, you can apply a little anti-seize compound to the arm.

Step 5 – Install the new blades fitted with the proper connector.

With the new blade in place, lower the wiper arm. Test the wipers by turning on the wipers, using water or the windshield washer to lubricate the surface of the glass. If the blades slip, turn off the wipers and seat the attachments more firmly.

IMPORTANT TIPS:

  • It is better to replace the whole wiper blade, not just the rubber part.
  • If your car has wipers that park behind the lip of the hood, turn on the ignition and the wipers and then shut off the ignition when the wipers are mid-stroke so you can access them.
  • Changing wiper blades for the first time has been known to cause extreme frustration—contact your local NAPA AutoCare Center if you are having trouble.
  • Don’t let the windshield wiper arm snap back against the windshield when there is no blade attached; this can crack the windshield. Lay a clean rag on top of the windshield to protect the glass in case the bare-metal wiper arm suddenly snaps down on the windshield’s glass.
  • Clean your glass regularly, including before installing your new blades. This will minimize the buildup of foreign materials on the blades, improving the longevity of your windshield and wiper blades and ensuring good visibility.

on

How to Replace an Engine Air Filter

Difficulty: Easy
Duration: 15 minutes
How often: Every 15,000 miles

Changing the air filter should be part of your routine maintenance schedule. Change your engine air filter every 15,000 miles or once a year. If you live in an especially dusty or dirty area, change it more often.

Air filter test: Shine a flashlight from the inside out of your air filter. If you can’t see any light or very little light, it needs to be replaced. Change the breather filter and check the PCV at the same time. On most cars, this is a fairly simple procedure.

Things you’ll need from your garage or your local NAPA AUTO PARTS Store:

  • Flat-Head/Phillips screwdrivers
  • Adjustable or open-end wrench
  • Pliers
  • New air filter
  • New breather filter (if so equipped)

Step 1 – Locate the air filter housing under the hood.

It will likely be square (on fuel-injected engines) or round (on older carbureted engines) and about 12 in. (30 cm.) in diameter. On older vehicles, it will be in a large round housing on the top of the engine. On newer vehicles, it will be on the end of the large black intake hose opposite the engine mounted on one of the fender wells.

Step 2 – Remove screws or clamps.

Use a screwdriver to remove the screws or clamps that hold on the top of the housing. If you have an older vehicle with the round air filter housing, remove the wing nut holding the air filter cover and any other clips.

Step 3 – Remove the old air filter.

Take out the old air filter and clean any dirt and debris from the housing with a clean rag. Be careful that none falls into the carburetor or the intake. Remove the breather filter.

Step 4 – Install the new air and breather filters.

Replace the air cleaner top. Reinstall the attaching hardware and air intake hose (if applicable).


More from Team Valvoline:
Understanding the Four Types of Auto Filters
Choosing The Right Filters For Your Car

IMPORTANT TIPS:

  • When the air filter is out, you should replace the PCV filter as well. It should only take about 5 minutes.
  • You’ll need to know the year, make, model and, in some cases, engine type of your car when you buy supplies. If you use our NAPA Know How App, you can scan your VIN so you’ll always have the information you need.

on

How to Replace a Radiator Hose

Difficulty: Easy
Duration: 10 minutes
How often: Every 60,000 miles

All modern automotive engines are liquid-cooled, and the cooling system is essential to keep these engines from overheating. Radiator hoses carry coolant, or antifreeze, between the engine and radiator. Over time, a radiator hose is exposed to high heat and, in some climates, freezing temperatures, too. To prevent a failure, replace your radiator hose to keep the cooling system operating correctly and to prevent your engine from overheating.

If your car is over four years old or has more than 60,000 miles, it may be time to replace your hose. If you do a lot of stop-and-go driving wear can occur even quicker. If a leak develops, you run the risk of overheating your engine and should replace the hose immediately.

Before you begin to replace your radiator hose, you need to make sure you can reach it easily. If so, use this guide to learn how to replace a radiator hose. If the hose is in a difficult location or you prefer to have a professional replace the hose, your local NAPA AutoCare Center can do the job for you.

Things you’ll need from your garage or your local NAPA AUTO PARTS Store:

  • New radiator hose
  • Original equipment recommended coolant
  • Distilled water
  • Screwdriver
  • Utility knife
  • Large pan or bucket

Step 1

Make sure your car has cooled down before touching or opening the radiator.

Step 2

Place a large pan under the radiator and drain it by unscrewing the drain plug. This is located at the bottom of the radiator.

Step 3

Use a flat head screwdriver to remove the hose clamps on both ends of the hose. You may have to use a utility knife to remove the hose completely. If so, remember to cut carefully so you don’t damage the radiator.

Step 4

Put the hose clamps on to the new radiator hose and put it in proper position. Tighten the hose clamps.

Step 5

Use a mixture of half parts coolant and half parts water to refill the radiator. Always use the coolant recommended by the car manufacture. Use either pure coolant mixed with distilled water or use premixed coolant.

Step 6

Leaving the radiator cap open, start your car and turn the heat to the maximum setting. Press the gas pedal to approximately 1/4 throttle, holding for about 10 seconds at least two to three times. Do not press the gas pedal to the floor.

Step 7

Secure the radiator cap.

IMPORTANT TIPS:

  • Radiator hose replacement is recommended every four years or 60,000 miles. Stop and go traffic may require more frequent replacement of your hose.
  • If you are going to replace your hose yourself, be sure to get the exact hose for your year, make and model. Hoses are not interchangeable; each requires a specific size and shape.
  • If your vehicle requires a new water pump, this is a sign that it has overheated before and hose replacement is suggested.
  • If your vehicle requires a new radiator cap, check your radiator hose carefully. A faulty cap can put additional pressure and wear on the radiator hose.