
How to Replace Brake Pads
Difficulty: Moderately Difficult
Duration: 1-2 hours
How often: As needed, depending on brake wear
A well-maintained set of brakes should last you for tens of thousands of miles, but brake pads do wear down over time and will eventually need replacing. With a little patience and some elbow grease you can do the job yourself, and save some money in the process. If you would rather leave it to a pro, your local NAPA AutoCare Center can help.
Before You Get Started
There are a few things you should know before changing your brake pads. First, most vehicles have a “sliding caliper” brake assembly, but some have a “fixed caliper” assembly. In this guide, we will be working with a “sliding caliper” brake assembly. Second, change the brake pads one side at a time, from start to finish. You can turn the steering wheel toward the side you are working on, to allow for better access to the brake pads and calipers.
Check for Brake Wear
Conveniently, most brake pads have a wear indicator, which warns you when the pads have worn down. The wear indicator is a small piece of metal embedded in the brake pad that makes contact with the rotor when the pad wears down, resulting in a squealing noise as you apply the brakes. If you hear this sound, it’s time to change your brake pads.
Things you’ll need from your garage or your local NAPA AUTO PARTS Store:
- New brake pads
- C-clamp (some vehicles will require a brake caliper tool)
- Graphite-based grease
- Jack and jack stands
- Lug wrench
- Wrench (a socket, open or adjustable wrench should work)
- Disposable mechanic’s gloves
- Dust mask and safety glasses
Step 1
Loosen the lug nuts on the wheel, then jack up the vehicle and place the jack stands underneath the frame. Check your vehicle’s manual for exact positioning of the jack and jack stands. Once the jack stands are in place, lower the jack so that the vehicle is completely supported by the jack stands. Finish removing the lug nuts and remove the wheel.
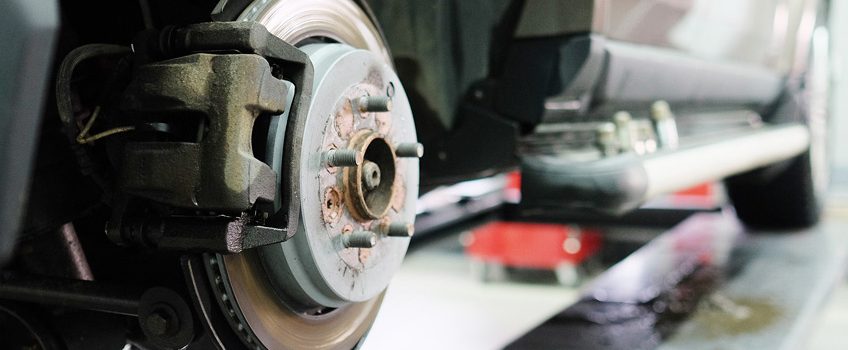
Before you continue, examine the brake rotor (disc) for damage and wear. You may notice grooves in the brake rotor. If the grooves are deep, or if the rotor looks damaged, you may need to have the rotors replaced or “turned” on a brake lathe. Take the vehicle to your nearest NAPA AutoCare Center if your rotors are damaged.
Step 2
Locate the two slider bolts that hold the caliper in place. Use your wrench to loosen the lower bolt and slide it out. The bolt will be long but should slide out easily once removed. Leave the top bolt in place.
Step 3
Once you have removed the lower slider bolt, pivot the caliper off the rotor. The caliper will still be connected to the brake line, however the line is made of flexible rubber and should allow you to pivot the caliper with no problems. Make sure the brake line is free of kinks when you pivot the caliper.
Step 4
Remove any retaining clips, pins or bolts that may be holding the brake pads in place. Then slide out the old pads. At this point, you can thoroughly examine the brake pads. If they are 1/8″ thick or less, they need replacing.
Step 5
New brake pads usually come with new retaining clips. The clips may be specific to either the left or right side of the vehicle, so make sure that you are using the appropriate clip. Remove the old clips and replace them with new ones. They will easily snap into place. Applying graphite-based grease to the clips will help keep your brakes from squeaking.
Step 6
Slide the new brake pads into place. They should easily slip into the greased retaining clips. The new brake pads will have shims either riveted to the brake pad or unattached. If your brake pads have unattached shims, they will need to be held into place until you lock the pads in place.
Step 7
It is now time to lower the caliper back into position, but before you can do so, you will have to retract the caliper pistons so they will fit over the thicker, new brake pads. First, remove the brake fluid reservoir cap, to lessen the pressure of the brake fluid. Then, place the threaded end of the c-clamp against the caliper piston and tighten the c-clamp, pushing the piston back. If the c-clamp doesn’t seem to be working, don’t force it. Some vehicles require a specialty brake caliper tool to retract the pistons.
Step 8
Once the pistons have been retracted, pivot the brake caliper back into position over the rotor. If the caliper doesn’t fit over the new pads, the pistons may not have been retracted completely. Once the caliper fits back into position, insert the lower slider bolt and tighten it down. Make sure the upper slider bolt is secure, as well.
Step 9
Replace the cap on the brake fluid reservoir, straighten the steering wheel and pump the brakes a few times from inside the car until the brakes are properly seated. Next, Put the wheel back on and tighten the lug nuts. Lower the vehicle off the jack stand. Once the vehicle is back on the ground, finish tightening the lug nuts.
Start over from step one and repeat the process to change the brake pads on the other side of the vehicle. Once complete, take the vehicle for a test drive to make sure that your work was successful.
More from Team Valvoline:
Inside Brakes and How They Operate
Choosing the Right Brake Pads
IMPORTANT TIPS:
- Consult your owner’s manual or visit your local NAPA AUTO PARTS store to ensure you purchase the correct brake pads for your vehicle.
- You’ll need to know the year, make, model and, in some cases, engine type of your car when you buy supplies. If you use our NAPA Know How App, you can scan your VIN so you’ll always have the information you need.
- Make sure your vehicle is securely supported. You will need two jack stands to support the front of your vehicle.
- Use mechanic’s gloves and wear a dust mask and safety glasses to protect from brake dust and other debris.
- Remember, you can always take your vehicle to a NAPA AutoCare Center and have your brakes replaced for you.