Category: Know-How

on

How to Change Oil

Difficulty: Easy
Duration: 30 minutes
How often: Every 3,000-5,000 miles or every 3 months

More from Team Valvoline:
What is motor oil and why do you need it?
Why is there more than one kind of motor oil?

Changing your vehicle’s engine oil is not a difficult task, but it is one that must be done properly. Learn how to change oil by following these steps. A correctly performed oil change extends your vehicle’s life while keeping you and the environment safe.

Things you’ll need from your garage or your local NAPA AUTO PARTS Store:

  • Oil catch/recycle container
  • Funnel
  • New NAPA GOLD oil filter
  • Oil drain plug gasket
  • 4-5 qt. new oil*
  • Oil filter wrench set**
  • Clean rags
  • Car jack
  • Jack stands
  • Safety glasses
  • Mechanics work gloves
  • Hand cleaner

*Check your owner’s manual for your vehicle’s oil capacity. Some vehicles take up to 15 quarts!

**If you plan to change your oil regularly, consider investing in a small tool set, an oil filter wrench set, a quality floor jack and jack stands.

Step 1 – Park your car on a level surface and apply parking brake.

Run your engine for 5 minutes before draining oil, as warm oil drains faster than cold. Do NOT drain oil that is at full operating temperature as it will be too hot to safely handle. Remove your keys from the ignition, as some hybrid models can auto-start. To be safe, always check your owner’s manual before working on a specialty vehicle.

Step 2 – Jack your car up and place it on jack stands.

A jack alone will not safely support the full weight of your car. Consult your manual for the proper jacking points. The placement of a jack stand is just as important as the jack placement. The wrong placement can damage your car’s suspension or body parts.

Step 3 – Locate the oil drain plug and place the drain pan below.

The oil drain plug is usually near the front center of the engine, but some vehicles have more than one plug. Check your manual for the exact location. Loosen the plug with a socket or wrench. Make sure that the drain pan is large enough to hold 4-5 quarts of oil or more. The oil drains at an angle, so position the drain pan to catch it.

Step 4 – Unscrew the plug by hand.

Remove the plug by hand. While unscrewing the plug, push it back towards the vehicle. This keeps oil from rushing out until you are ready to remove the plug from the hole.

Step 5 – Drain all oil.

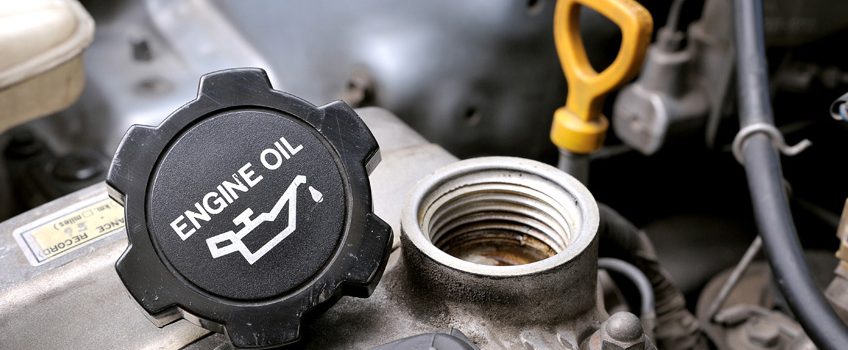
To speed up the draining process, remove the filler cap located on the top of the engine and allow air to enter from the top. Check your owner’s manual for the exact location.

Step 6 – Replace oil plug.

Tighten the oil plug by hand and ensure it is not cross-threaded. Once the plug is snug, finish tightening it with a wrench or by hand. Always use a new drain plug gasket and never over-tighten the drain plug.

Step 7 – Remove existing oil filter.

Place the oil pan underneath the old filter to catch any remaining oil while unscrewing it. Remove the old filter using an oil filter wrench. Use a rag to clean the mounting surface. Make sure that the sealing O-ring from the old filter is not stuck to the mounting surface on the engine. Note: Some vehicles use remote mounted oil filters that may be on top or on the side of the engine.

Step 8 – Lubricate new filter and screw into place by hand.

Lightly coat the rubber seal of the new filter with fresh oil. It’s usually not necessary to tighten the oil filter with the wrench. Refer to the filter’s instructions. Once the filter is installed, lower the car.

Step 9 – Clean the oil filter neck and pour in the new oil using a funnel.

Typically, you will use 4 to 5 quarts of oil, but check your manual for your vehicle’s oil capacity. Fill to three-quarters of the engine’s capacity to avoid overfilling, as there is always oil that does not drain. Then replace the cap.

Step 10 – Run the engine for a few minutes to make sure there are no leaks.

Check the area around the oil drain plug and the filter for any leaks. If you notice a leak, shut the engine off immediately and remedy any leaks. Check the dipstick afterward, and add more oil if necessary.

Step 11 – Dispose of the used oil properly.

Bring your used oil to a recycling center or a NAPA AUTO PARTS store to recycle it for you. These are the only acceptable methods for oil disposal.

IMPORTANT TIPS:

  • Read your owner’s manual or see your local NAPA AUTO PARTS store specialists to ensure you are using the correct type of oil and oil filter.
  • You’ll need to know the year, make, model and, in some cases, engine type of your car when you buy supplies. If you use our NAPA Know How App, you can scan your VIN so you’ll always have the information you need.
  • Make sure your car is securely supported. You will need two jack stands to support the front of your car after jacking it up.
  • Record the date and mileage after you change the oil so you will know when your car is due for another oil change. It helps to put a small sticker on your windshield to remind you.
  • Handle hot motor oil with extreme caution.
  • Use mechanic’s gloves to keep your hands protected and clean.
  • Only dispose of used motor oil and filters at authorized locations.
  • If you prefer to rely on a professional, your local NAPA AutoCare Center can change your vehicle’s oil for you.

on

How to Replace a Car Battery

Difficulty: Easy
Duration: 10-30 minutes
How often: Every 3-5 years

If you need to jump start your car in the morning, it might be time for a new battery. You can bring your car to a NAPA AutoCare Center for a new battery or you can change it yourself.

Changing a car battery is a relatively easy job that can be accomplished with only a few tools. However, some vehicles’ batteries are located in tough-to-service areas such as under the front fender, under the rear seat or in the trunk. If this is the case, consider having it changed at your local NAPA AutoCare Center.

Your battery supplies the electrical current necessary to start the engine. It also provides necessary power to the electrical components and accessories even when the vehicle’s engine isn’t running. The battery also acts as voltage stabilizer for the whole electrical system.

Things you’ll need from your garage or your local NAPA AUTO PARTS store:

  • New battery
  • Battery terminal cleaning brush
  • Proper tools to remove the battery terminals and hold-down
  • OBDII memory saver (optional, recommended for late-model cars)

Step 1 – Buy a replacement battery for your car.

You must know the make and model of your car to make the correct purchase. It also helps to know your battery’s BCI number. Car batteries come in different sizes, construction types, CCA (cold cranking amps) and amp-hour ratings. You want the replacement battery to match the original battery as closely as possible.

Step 2 – Locate the battery, typically under the hood.

Identify the positive and negative terminals. Positive terminals are labeled with a “+” or color-coded red. Negative terminals are labeled with a “-” or color-coded black. Loosen the bolt that holds the negative terminal and remove the negative cable first. Next, remove the positive cable.

Step 3 – Unscrew the battery hold down clamp.

Lift the battery and remove it from the car. Inspect the battery terminal clamps. Clean or replace them if necessary.

Step 4 – Clean the battery tray.

Use plenty of fresh water or a mixture of baking soda and water. Wait for the terminal clamps and the battery tray to dry before installing the new battery.

Step 5 – Clean all corrosion from your battery.

Corrosion can be cleaned off using a stiff brush and a baking soda/water solution. After removing the corrosion, rinse off the battery with water. Clean the battery tray by wiping it out with moist paper towels and mild detergent. NAPA AUTO PARTS stores carry anti-corrosive battery spray. Use this to prevent future corrosion.

Step 6 – Place the new battery into the battery tray.

Make sure the positive and negative terminals are on the correct sides, and then install the battery hold-down. Reattach and tighten the positive cable first before reattaching the negative cable.

Step 7 – Start your car.

Verify that the installation is complete and the cables are securely attached to the battery posts. Gather your tools and close the hood of your car securely.

Step 8 – Dispose of the old battery properly.

Car batteries contain highly toxic material and cannot be thrown out with your garbage. You can dispose car batteries at your local NAPA AUTO PARTS store or NAPA AutoCare Center.

IMPORTANT TIPS:

  • Wear gloves whenever working with batteries and follow all safety precautions listed in your owner’s manual.
  • You’ll need to know the year, make, model and, in some cases, engine type of your car when you buy supplies. If you use our NAPA Know How App, you can scan your VIN so you’ll always have the information you need.
  • Your battery and charging system or alternator should be inspected at least once a year at your local NAPA AutoCare Center.
  • Neutralize any electrolyte spills or corrosion with a solution of baking soda and water.
  • Always remove the negative terminal first.
  • Protect your eyes with safety glasses when changing a car battery.
  • Never touch a metal tool across the battery terminals, or from the positive post to any other metal on the car. This will help prevent large sparks and damage.
  • Extinguish all smoking materials and open flames. Be cautious about creating any electrical sparks around the battery.

on

NAPA Brake Kit Buying Guide

NAPA Brakes Kits offer multiple pad and rotor combinations to provide safe, reliable, and confidence-inspiring stopping performance tailored to your driving needs. Based on decades of brake engineering experience, NAPA Brakes Kits include our technician recommended top-selling products for rotors and pads that can only be found at NAPA Auto Parts.

DISC BRAKE PADS OPTIONS

Adaptive One Friction Formula

∙Best in class technology for high demand brake torque applications and shortest stopping distances
Hybrid ceramic brake pad formulations minimize dust, eliminate noises, and reduce rotor wear
Improved rotor contact points for a smooth and consistent brake performance for the life of the pad
Long-lasting friction materials extend service intervals and are supported by a lifetime warranty
Installation hardware included for most applications

NAPA Premium Friction Formula

∙Better than Original Equipment stopping power for multi-passenger, hauling, and towing needs
Silent Guard multi-layer shims and anti-corrosive coatings prevent noise
Vehicle specific compounds maintain normal braking distances even during high-heat panic stops
Supported by a 24 month/unlimited mileage warranty
Installation hardware included for most applications

NAPA Proformer Friction Formula

∙Good replacement solution designed to meet Original Equipment specifications
Rubberized shims and pad material reduce noise and brake dust
Chamfered pad surfaces provide confident brake pedal feel
Features a 12 month/unlimited mileage warranty
Installation hardware included for some applications

NAPA Fleet Friction Formula

∙Specialty severe-duty formula for everyday high-mileage stop and go usage
Retains normal braking performance even under sustained or extreme heat
Ideal for all-day use, pursuits, or hauling heavy cargo loads regularly
Noise free guarantee for the life of the pads
Installation hardware included for most applications

DISC BRAKE PADS OPTIONS

NAPA Ultra Premium Coated Rotors

∙Best choice for superior stopping power and vehicles exposed to road salt or wet conditions
Polymer coating prevents corrosion that can impact brake pedal feel and cooling characteristics
CNC machine finish and carbon alloy metals eliminate vibrations and extend rotor service life
NAPA Ultra Premium Coated Rotors are backed by a limited lifetime warranty

NAPA Premium Rotors

∙A good solution for all vehicles including applications that occasionally tow or carry heavy loads
Precision machined surfaces and exact rotor thickness provide consistent brake performance
Cooling vane configuration and carbon metallurgy prolong replacement intervals
NAPA Premium Rotors feature a 12 month/12,000 mile warranty

NAPA Fleet Rotors

∙Specialty rotor with proprietary metal alloys that increase strength and dissipates heat quickly
Exactly balanced for vibration free service for the life of the rotor
Optimized to be matched with NAPA Fleet brake pads for extended service intervals
Our most severe-duty rotor for outstanding performance and reliability

on

Akebono - Innovative Brake Solutions

Akebono brakes have more than 85 years of brake design expertise in every product they manufacture and are the originator of low dust ceramic pad technology. When looking for the ultimate choice in reduced brake noise, vibration and harshness (NVH) without sacrificing braking performance, Akebono is the undisputed leader in the category. Whether you drive a domestic, Asian or European vehicle, there is an Akebono brake pad that can restore your car, truck, or SUVs stopping power back to factory. Key automotive OEM customers include: Audi, Chrysler, Ford, General Motors, Honda, Isuzu, Mitsubishi, Toyota and Volkswagen.

Akebono is the most popular Original Equipment Manufacturers’ brake pad brand in North America and is proudly made in the USA. When it’s time to replace your brake pads, shop our ultra premium line of Akebono brake pads at NAPA Auto Parts.

Pro-ACT® Ultra-Premium Brake Pads

∙Application-Specific Friction Formulations so Vehicles Stop Like New
∙Virtually eliminates noise, vibration and harshness (NVH)
Clean wheels
Unrivaled stopping power
No break-in required
Rotor friendly for longest rotor life
Perfect upgrade for all braking systems

EURO® Ultra-Premium Brake Pads

Akebono EURO® Ultra-Premium brake pads are designed for use in the following vehicle applications: Audi, BMW, Fiat, Jaguar, Land Rover, Mercedes-Benz, MINI, Porsche, SAAB, Volvo and VW
High Mu ceramic formulations for superior initial bite with outstanding pedal feel
Definitive control of noise, vibration and harshness (NVH)
Clean wheels
Environmentally friendly with low copper content to comply with CA and WA 2021 restrictions
Extremely rotor friendly for longer rotor life
Sensors (where applicable)

PERFORMANCE® Ultra-Premium Brake Pads

Specifically engineered for towing demands, fleets, law enforcement and extreme use
Made from a proprietary mix of unique ceramic formulations for best in class performance
Precise fit that virtually eliminates brake squealing, groaning and vibration
Ultimate upgrade for OE semi-metallic and low-metallic brake pads
Fade resistant and fast recovery enhanced braking power
Enhanced braking power with a smooth and confident pedal feel
Ultra Quiet and Low Dusting