Category: Know-How

on

How to Replace a Headlamp or Taillight

Difficulty: Easy
Duration: 15 minutes
How often: When lights dim or burn out

For maximum driving safety, it is very important to keep a close eye on how your car lights are functioning. If a light goes out, follow these steps to replace it and continue driving safely.

Before replacing it, look in your owner’s manual to identify the type of headlamp your vehicle uses. In general, there are two kinds of headlamps—sealed beam and composite. Sealed beam lights are common in older cars, while composite lights are found in newer models and include a special housing with a removable halogen or xenon bulb.

Things you’ll need from your garage or your local NAPA AUTO PARTS Store:

  • Automotive light bulbs
  • Cleaning cloths
  • Rubber gloves
  • Screwdriver set(s)

COMPOSITE HEADLAMP REPLACEMENT

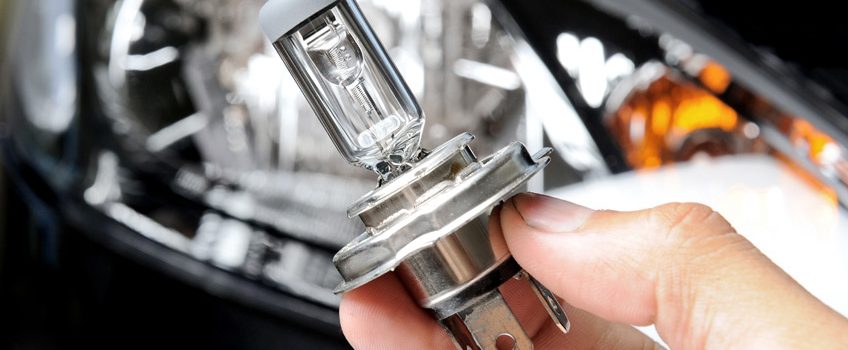
Newer cars use composite headlamps with a separate housing and bulb or capsule. Composite headlamps are easy to change because the reflective housing stays on the vehicle. Only the capsule (bulb) gets replaced.

Step 1

Turn the car lights on to find out which headlamp needs replacing. Once you have located the light, turn your car and lights off completely.

Step 2

Locate the wiring harness attached to the back of the headlamp and remove it. Review your owner’s manual for additional assistance if necessary.

Step 3

Remove the bulb retainer by gently twisting and pulling it back.

Step 4

Pull the bulb straight out. Only handle the base of the bulb.

Step 5

Use a clean rag or wire brush to remove any corrosion in the connection area.

Step 6

Holding only the base of the bulb and not the glass, attach the new bulb and make sure the tabs are lining up properly. Reattach the retainer and confirm everything is locked in place.

Step 7

Reattach the wiring harness and test your headlamp to make sure it is working properly. If the light does not come on, double-check the wiring harness to ensure that it’s fully seated. If it’s still not working, there may be a fuse or electrical problem. Contact yourlocal NAPA AutoCare Center for assistance.


More from Team Valvoline:
Types of Headlights
How to Troubleshoot Exterior Lighting Issues


SEALED BEAM HEADLAMP REPLACEMENT

These headlamps come in a 2- or 4-light system and can be round or rectangular. Sealed beam is the older style of headlamp that includes a large, glass reflective enclosure.

Step 1

Turn the car lights on to find out which headlamp needs replacing. Once you have located the light, turn your car and lights off completely.

Step 2

Locate and remove the protective bezel (cover) and retaining ring that is screwed in and holds your headlamp securely in place. You may need a Phillips-head screwdriver or a special Torx tool to remove them. Check your owner’s manual for recommendations. If your screws are sticky, spray them with penetrating solvent. Hold the headlamp as you remove the screws to avoid shattering.

Step 3

Pull the wiring connector off the prongs on the back of the light. Clean the connector socket with electric contact cleaner and inspect its wires for wear.

Step 4

Push the prongs onto the new headlamp and place it back into place. Make sure that the headlamp is right side up.

Step 5

Replace the retaining ring and protective bezel.


TAILLIGHT REPLACEMENT

Step 1

Turn the car lights on to find out which taillight needs replacing. You may need a friend’s help to check brake lights and turn signals. Once you have located the light, turn your car and lights off completely.

Step 2

Check your owner’s manual to determine whether the lens can be accessed from the outside (screws will be visible) or the inside (remove the plastic cover to get to the bulb).

Step 3

Remove the bulb by gently twisting and pulling it back.

Step 4

Use a clean rag or wire brush to remove any corrosion in the connection area.

Step 5

Attach the new bulb by gently pushing in and turning it at the same time. Make sure the tabs are lining up properly.

Step 6

Replace the lens or plastic cover and test the bulb to make sure it is working. Have someone watch the bulb as you step on the brakes and turn on the lights. If there is no illumination, this may be a wiring or electrical problem and you should contact your local NAPA AutoCare Center for assistance.


IMPORTANT TIPS:

  • Do not confuse the retaining screws with the headlamp’s aiming screws. The aiming screws ensure proper headlamp movement and beam adjustment.
  • Use gloves when handling the new light to prevent oils from your hands potentially affecting the life of your new bulb.
  • Bring your old headlamp into your local NAPA AUTO PARTS store to ensure the exact replacement.
  • Brake lights, reverse lights and turn signals are typically installed similarly to taillights. Use the same procedure to replace these bulbs.

on

How to Replace Brake Pads

Difficulty: Moderately Difficult
Duration: 1-2 hours
How often: As needed, depending on brake wear

A well-maintained set of brakes should last you for tens of thousands of miles, but brake pads do wear down over time and will eventually need replacing. With a little patience and some elbow grease you can do the job yourself, and save some money in the process. If you would rather leave it to a pro, your local NAPA AutoCare Center can help.

Before You Get Started

There are a few things you should know before changing your brake pads. First, most vehicles have a “sliding caliper” brake assembly, but some have a “fixed caliper” assembly. In this guide, we will be working with a “sliding caliper” brake assembly. Second, change the brake pads one side at a time, from start to finish. You can turn the steering wheel toward the side you are working on, to allow for better access to the brake pads and calipers.

Check for Brake Wear

Conveniently, most brake pads have a wear indicator, which warns you when the pads have worn down. The wear indicator is a small piece of metal embedded in the brake pad that makes contact with the rotor when the pad wears down, resulting in a squealing noise as you apply the brakes. If you hear this sound, it’s time to change your brake pads.

Things you’ll need from your garage or your local NAPA AUTO PARTS Store:

  • New brake pads
  • C-clamp (some vehicles will require a brake caliper tool)
  • Graphite-based grease
  • Jack and jack stands
  • Lug wrench
  • Wrench (a socket, open or adjustable wrench should work)
  • Disposable mechanic’s gloves
  • Dust mask and safety glasses

Step 1

Loosen the lug nuts on the wheel, then jack up the vehicle and place the jack stands underneath the frame. Check your vehicle’s manual for exact positioning of the jack and jack stands. Once the jack stands are in place, lower the jack so that the vehicle is completely supported by the jack stands. Finish removing the lug nuts and remove the wheel.

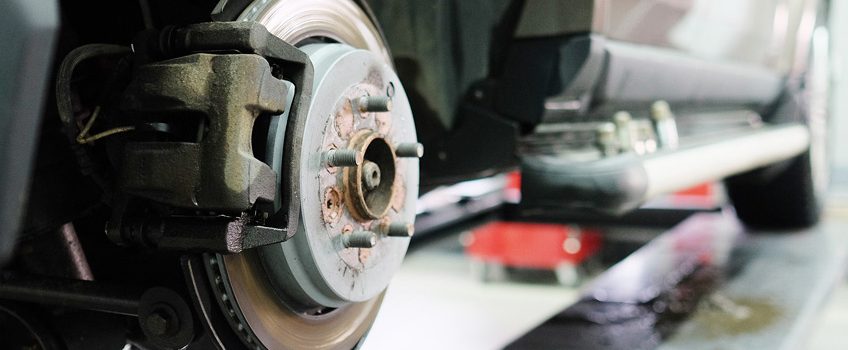
Before you continue, examine the brake rotor (disc) for damage and wear. You may notice grooves in the brake rotor. If the grooves are deep, or if the rotor looks damaged, you may need to have the rotors replaced or “turned” on a brake lathe. Take the vehicle to your nearest NAPA AutoCare Center if your rotors are damaged.

Step 2

Locate the two slider bolts that hold the caliper in place. Use your wrench to loosen the lower bolt and slide it out. The bolt will be long but should slide out easily once removed. Leave the top bolt in place.

Step 3

Once you have removed the lower slider bolt, pivot the caliper off the rotor. The caliper will still be connected to the brake line, however the line is made of flexible rubber and should allow you to pivot the caliper with no problems. Make sure the brake line is free of kinks when you pivot the caliper.

Step 4

Remove any retaining clips, pins or bolts that may be holding the brake pads in place. Then slide out the old pads. At this point, you can thoroughly examine the brake pads. If they are 1/8″ thick or less, they need replacing.

Step 5

New brake pads usually come with new retaining clips. The clips may be specific to either the left or right side of the vehicle, so make sure that you are using the appropriate clip. Remove the old clips and replace them with new ones. They will easily snap into place. Applying graphite-based grease to the clips will help keep your brakes from squeaking.

Step 6

Slide the new brake pads into place. They should easily slip into the greased retaining clips. The new brake pads will have shims either riveted to the brake pad or unattached. If your brake pads have unattached shims, they will need to be held into place until you lock the pads in place.

Step 7

It is now time to lower the caliper back into position, but before you can do so, you will have to retract the caliper pistons so they will fit over the thicker, new brake pads. First, remove the brake fluid reservoir cap, to lessen the pressure of the brake fluid. Then, place the threaded end of the c-clamp against the caliper piston and tighten the c-clamp, pushing the piston back. If the c-clamp doesn’t seem to be working, don’t force it. Some vehicles require a specialty brake caliper tool to retract the pistons.

Step 8

Once the pistons have been retracted, pivot the brake caliper back into position over the rotor. If the caliper doesn’t fit over the new pads, the pistons may not have been retracted completely. Once the caliper fits back into position, insert the lower slider bolt and tighten it down. Make sure the upper slider bolt is secure, as well.

Step 9

Replace the cap on the brake fluid reservoir, straighten the steering wheel and pump the brakes a few times from inside the car until the brakes are properly seated. Next, Put the wheel back on and tighten the lug nuts. Lower the vehicle off the jack stand. Once the vehicle is back on the ground, finish tightening the lug nuts.

Start over from step one and repeat the process to change the brake pads on the other side of the vehicle. Once complete, take the vehicle for a test drive to make sure that your work was successful.


More from Team Valvoline:
Inside Brakes and How They Operate
Choosing the Right Brake Pads

IMPORTANT TIPS:

  • Consult your owner’s manual or visit your local NAPA AUTO PARTS store to ensure you purchase the correct brake pads for your vehicle.
  • You’ll need to know the year, make, model and, in some cases, engine type of your car when you buy supplies. If you use our NAPA Know How App, you can scan your VIN so you’ll always have the information you need.
  • Make sure your vehicle is securely supported. You will need two jack stands to support the front of your vehicle.
  • Use mechanic’s gloves and wear a dust mask and safety glasses to protect from brake dust and other debris.
  • Remember, you can always take your vehicle to a NAPA AutoCare Center and have your brakes replaced for you.

on

How to Replace an Accessory Drive Belt (Serpentine Belt)

Difficulty: Moderately difficult
Duration: May take several hours
How often: Every 60,000-100,000 miles, check owner’s manual

One out of every five vehicles on the road needs a new belt. Our NAPA Know How guide helps you through the steps necessary for proper diagnosis.

The introduction of ethylene propylene diene monomer (EPDM) belts in the late 1990’s have made wear detection harder than with the old neoprene belts. Still, there are indicators to look for that signal it’s time for a new belt.

Learn the signs of belt wear and how to save money on belt replacement below. If you’re confident in your ability to tackle this moderately difficult job, use this guide to help you do it properly. If you prefer to leave it to a professional, take your vehicle to your local NAPA AutoCare Center.

Make smart repair decisions. If your vehicle needs a drive belt accessory component like an alternator or water pump replaced, install a new belt at the same time. If you’re doing it yourself, you’ll save time. If you take it to the shop, chances are you will pay only for the belt and not the labor to install it.

Perform preventative maintenance. One way to make sure your belts are up to par is to schedule a belt replacement during a routine checkup. If a belt has 65,000 to 70,000 miles on it and your vehicle is already in the shop, go ahead and replace the belts. The technician should also check the condition of the automatic belt tensioner to ensure that the new belt is properly tensioned.

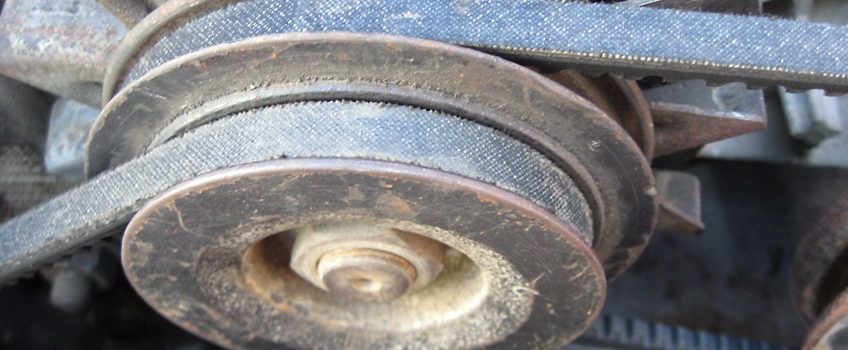
Inspect belts for wear. Some of the visual signs that indicate it’s time for belt replacement are abrasion/misalignment, cracking, glazing or pilling.

  • Abrasion/misalignment: The nylon on your belt is essential. If there are any tears, they may cause misalignment and your belt won’t work properly. If the belt is misaligned and slipping, you will hear unusual noise or feel vibrations.
  • Cracking: With Neoprene belts, it was common to look for three cracks in three inches, as a rule that the belt’s life was over and it needed to be replaced. The new EPDM belts are built to resist cracking, making it harder to notice wear at first glance. With EPDM belts, look for rubber loss that’s similar to how a tire wears out over time. The loss of just 5% of the belt material can cause the ribs of the belt to “bottom out” on the pulley(s). This accelerates belt wear and causes it to slip, which may affect the water pump, alternator or air conditioning compressor performance.
  • Glazing: The belt is hard at work bending and flexing against a pulley, producing heat that causes its rubber to harden over time. If the belt gets loose, the added friction makes it hotter. This causes glazing and makes the belt slip more.
  • Pilling: As your belt ages, it loses material that can build up in the belt grooves. This can contribute to a lack of tension, misalignment and worn pulleys.

Know the two major causes of belt failure: improper tension and misalignment. Vehicles using a single serpentine belt often use an automatic belt tensioning system. This system is designed to apply a constant force on a belt. The tensioner compensates for belt length changes due to wear or load changes within the system. The tensioner and associated pulleys should always be checked for wear when changing the belt. Tensioners normally fail at the same rate as belts fail.

STEP-BY-STEP INSTRUCTIONS:

  1. Mark the rotation direction on the belt.
  2. Unload the belt from the tensioner by rotating the tensioner.
  3. Remove the old tensioner from the engine (if the tensioner is being replaced).
  4. Install the new tensioner.
  5. Torque the mounting bolts to 1/3 installation torque in a star pattern.
  6. Retighten the bolts to 2/3 torque, then to full torque.
  7. Install the belt in the same direction as the old belt.
  8. Load the belt on the tensioner by rotating the tensioner as indicated (see rotate to load pointer).
  9. Tighten the belt until the pointer falls between the two marks.
  10. The gauge window, showing the maximum and minimum marks, is located on an area between the base and arm of the tensioner assembly.


More from Team Valvoline:
Car Belts and How They Work
When to Replace Your Serpentine Belt

IMPORTANT TIPS:

  • The performance of your accessories is directly affected by the condition of your belts. Just a 5% loss of material can affect component performance.
  • You’ll need to know the year, make, model and, in some cases, engine type of your car when you buy supplies. If you use our NAPA Know How App, you can scan your VIN so you’ll always have the information you need.
  • Never use belt dressing or any type of substance to coat the belt. Contamination from applying a substance on the belt will adversely affect belt life.
  • There are no serviceable parts inside a tensioner. The entire assembly must be replaced.
  • When re-installing a belt, clean the pulley groves. Dirt or paint on the pulleys may cause belt noise.
  • A belt failure affects the driveability of the vehicle, potentially leaving passengers stranded until a new belt is installed. Include belt replacement in your vehicle’s preventative maintenance schedule.

on

How to Maintain Tires

Difficulty: Easy
Duration: 5-10 minutes
How often: Once every month plus before and after road trips

Maintaining good tires help improve your car’s gas mileage, improve tire life, and give a smoother ride. It is vital that you consistently inspect your tires for pressure and wear to make sure that your vehicle is safe. By following the steps below, you can learn how to maintain tires, saving you money and helping your vehicle operate at its best.

Things you’ll need from your garage or your local NAPA AUTO PARTS Store:

  • Tire gauge
  • Tread depth gauge (or a penny)
  • Air compressor

CHECK FOR TIRE WEAR

The tires are the only contact that your car has with the road, so proper maintenance is essential to safe driving. Check your tires for wear at least once a month as well as before and after road trips. There are many factors that contribute to wear on tires. Measuring your tires’ tread will help determine whether it is time for tire adjustments or replacement.

Step 1

Locate the wear bars between the tire treads. The wear bar is a narrow bridge of rubber in the groove, spanning individual tread blocks. If the tread is worn down level with the wear bar or close, the tire should be replaced.

Step 2

Use a tread depth gauge or a penny to more accurately measure wear across each tire, checking four points per tire. Place the metal rod of the tire depth gauge in the groove and push the casing down until it touches the tire. Check the depth reading. If it reads 2/32″ or less, replace the tire. If you do not have a tread depth gauge, insert a penny into the groove of the tread with Lincoln’s head face down. If you see the top of Lincoln’s head, replace the tire.

Step 3

Look for uneven wear across the tire and from one tire to another. If one or more tires is wearing unevenly across its tread or compared to the other tires, you may have low tire pressure or a problem with your tires or suspension system. Have a professional diagnose and repair any balance or alignment issues, and regularly rotate your tires to ensure even wear.

CHECK TIRE PRESSURE

Before you begin to assess your tires, make sure that they are cool. This ensures a more accurate reading, as pressure increases with heat. Tires automatically lose pressure through time and bumps and hard surfaces you encounter while driving. Recommended pressures vary, so check your owner’s manual or a label in the driver door jamb for the recommended tire pressure for your vehicle.

Step 1

Make sure your tires are cool prior to inspection. Park your car on a flat surface to get the most accurate reading.

Step 2

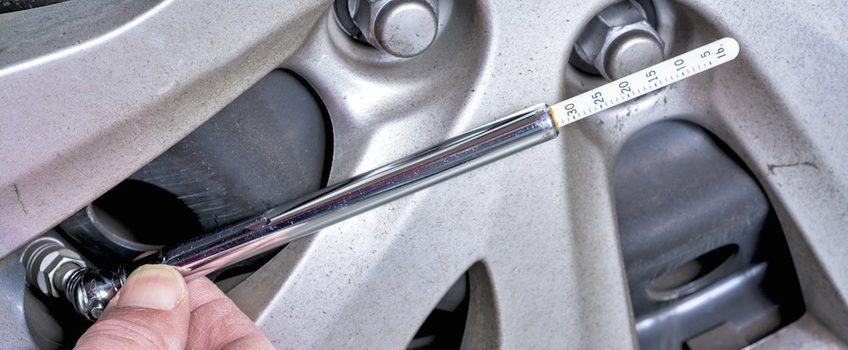
Remove the cap from the valve of your tire. Press the tire gauge on the valve to determine pressure. You may have to press hard to ensure that you have it inserted correctly. If you hear any air escaping, the valve is not correctly seated into the gauge. Compare the reading with the recommended tire pressure.

Step 3

If you determine that a tire needs air, insert the air pump into the valve and fill it to its recommended pressure level. If you have over-filled it, don’t worry. You can release air from your tire by pushing on the metal needle in the center of the valve stem with a fingernail or pen tip. Most tire gauges also include a tool or feature to let air out of the tire.

Step 4

Once the air has been adjusted to the proper level, replace the cap. Check the remaining tires in the same fashion.


IMPORTANT TIPS:

  • Check your tires for wear at least once a month and before and after road trips.
  • When checking tire pressure, make sure tires are cool and your car is parked on a flat surface to get the most accurate reading.
  • If your tires have green valve stem caps, the tires are filled with nitrogen. Instead of using atmospheric air from a compressor, return to the facility that filled your tires – or any shop offering nitrogen – to have them refilled. (See note regarding nitrogen below.)
  • Check your owner’s manual or ask your local mechanic for tire rotation recommendations. Rotating tires every 10,000 miles is a good rule of thumb.

Note: If you’re not already using nitrogen in your vehicle’s tires, consider making the switch. Offered in many auto care facilities, nitrogen increases your fuel economy, extends tire life and helps your vehicle ride more smoothly. Nitrogen is an inert gas with a larger molecule than oxygen, so it does not escape the tires as easily as regular air. It runs cooler and is affected less by changes in outside temperature. Regular air changes 1psi for every 10-degree temperature change, meaning a 40-degree change from morning to afternoon will have a 4psi difference just during the day. This change could trigger a warning in a vehicle equipped with a Tire Pressure Monitoring System (TPMS).