BLOG

on

How to Check Oil and Other Fluids

Difficulty: Easy
Duration: 5-10 minutes
How often: See each case below

To keep your vehicle running smoothly, it’s important to check fluid levels regularly. Checking fluids only takes a few minutes. Learn how to check oil and other fluids by following the steps below. If you have any questions, please contact your nearest NAPA AutoCare Center.

CHECKING OIL

Under normal driving conditions, you should change your oil every 3,000 to 5,000 miles. Consult your owner’s manual for your vehicle’s specific needs.

Step 1

Park your car on level ground, turn the engine off and remove the keys.

Step 2

Open the hood of your car and secure it with the prop rod. Locate the dipstick; it’s usually labeled “Oil”.

Step 3

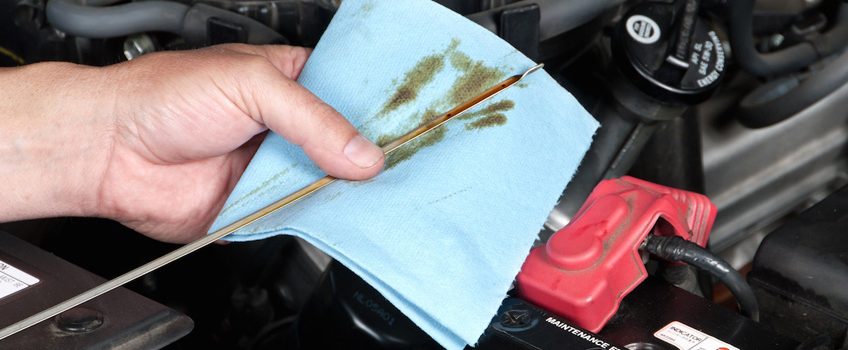
Remove the dipstick and wipe it clean. Return the dipstick to the tube, then remove it again and check the level of motor oil on the stick. If the level is below the minimum indicator, you need to add oil to your car.

Step 4

Check the color of the oil on the dipstick. Motor oil is usually a light clear fluid but will darken under normal conditions. If the oil is black, it should be changed along with the oil filter. If the oil is light brown and milky, this could indicate a coolant leak into the crank case.

Step 5

Feel the oil on the dipstick. If the oil feels gritty, change the oil.

Step 6

Smell the dipstick. If the oil has an odor of gas, it could indicate that the engine, fuel system or ignition system needs to be serviced.


More from Team Valvoline:
What is Motor Oil and Why do You Need It?
Why Is There More Than One Type of Motor Oil?


CHECKING TRANSMISSION FLUID

Step 1

Pull out the transmission fluid dipstick located at the back of the engine near the firewall. Wipe it off, replace it and pull it out again. Check the level against the markings at the bottom of the dipstick. A low level should be addressed immediately with a transmission specialist.

Step 2

Check the color of the fluid; it should be clear pink. Any darkness means it’s time for a fluid and filter change.

Some vehicles no longer have a transmission dipstick and need to be checked by an automotive professional. Check your owner’s manual for details. Manual transmissions’ oil levels should be checked by a NAPA AutoCare Center when the engine oil is changed.


More from Team Valvoline:
The Ins and Outs of the Automatic Transmission and the Fluid That Keeps It Going
Choosing the Right ATF for Your Vehicle

IMPORTANT TRANSMISSION FLUID TIPS:

  • Your car should be running when you check the transmission fluid level. Set the emergency brake and put the car in park when checking under the hood.
  • If you prefer, bring your car to your local NAPA AutoCare Center. Your professional service technician can check your fluid levels and perform any necessary fluid and filter changes.
  • Always be sure you are using the correct transmission fluid. Using the wrong fluid can severely damage the unit. Check your owner’s manual for your vehicle’s specifications.

CHECKING BRAKE FLUID

Check your owner’s manual to determine how often you should check your brake fluid. Checking brake fluid once a year is usually sufficient.

Step 1

Find the vehicle’s brake fluid reservoir. They are normally located on top of the engine and are labeled.

Step 2

Clean the area around the cap with an approved aerosol cleaner before removing the cap. Any particles of dirt that fall in the fluid may result in a costly service.

Step 3

Open the cap and check the fluid level on the dipstick that is attached to the underside of the cap. If the fluid level is low, have the car serviced at a NAPA AutoCare Center soon. Otherwise, it could lead to a larger problem. Never used old steering or brake fluids. Once opened and exposed to air and moisture, these fluids cannot perform the required functions and can harm the system.

Note: In some older vehicles, you need to check the master cylinder to check the fluid level. The master cylinder is a small metal box with a removable lid.


CHECKING COOLANT

Coolant should be changed every 30,000 miles or every two years as a general rule. Check your owner’s manual to see what is recommended for your vehicle.

Step 1

Locate the coolant reservoir under the hood of the car. See your owner’s manual for the exact location. Some cars only have an exposed cap.

Step 2

Check the fluid level. On the side of the reservoir, there are markings that show fluid levels. If the level of the liquid is low, add more of the proper coolant mix.


More from Team Valvoline:
What is Coolant and Why do I Need It?
How Does Coolant Actually Work?

IMPORTANT TRANSMISSION FLUID TIPS:

  • Never open the radiator cap on a hot engine. Allow it to cool for 15 to 20 minutes before opening.
  • If you prefer, bring your car to your local NAPA AutoCare Center. Your professional service technician can check your fluid levels and perform any necessary fluid and filter changes.

CHECKING BATTERY LEVEL

Most batteries have a three-to-five-year life span, but they can last longer with maintenance, including checking their fluid level.

Step 1

Look for the battery’s condition indicator, a visible window on the top of the battery that changes color.

Green/blue: Good
Red: Add distilled water
White: Needs charge

Check your owner’s manual or label on the battery for further information. The condition indicator should not be the only test done to determine if the battery is serviceable.

Step 2

If the battery needs more fluid, pour in a little at a time until the level reaches the top of the battery grids. Do not overfill. Always use distilled water, not tap or filtered water, to avoid contamination.


More from Team Valvoline:
How Do Batteries Work?
A Breakdown of Automotive Batteries

IMPORTANT BATTERY FLUID TIPS:

  • Certain batteries (maintenance-free) are sealed, and it is not possible to add fluid to them.
  • Not all batteries are in the same place. Some batteries are located under the rear seat, in the trunk or in the front inner fender.
  • Any time a battery is serviced, safety gloves, eye protection and fender protection should be used to prevent injury and damage to paint.

on

How to Change Oil

Difficulty: Easy
Duration: 30 minutes
How often: Every 3,000-5,000 miles or every 3 months

More from Team Valvoline:
What is motor oil and why do you need it?
Why is there more than one kind of motor oil?

Changing your vehicle’s engine oil is not a difficult task, but it is one that must be done properly. Learn how to change oil by following these steps. A correctly performed oil change extends your vehicle’s life while keeping you and the environment safe.

Things you’ll need from your garage or your local NAPA AUTO PARTS Store:

  • Oil catch/recycle container
  • Funnel
  • New NAPA GOLD oil filter
  • Oil drain plug gasket
  • 4-5 qt. new oil*
  • Oil filter wrench set**
  • Clean rags
  • Car jack
  • Jack stands
  • Safety glasses
  • Mechanics work gloves
  • Hand cleaner

*Check your owner’s manual for your vehicle’s oil capacity. Some vehicles take up to 15 quarts!

**If you plan to change your oil regularly, consider investing in a small tool set, an oil filter wrench set, a quality floor jack and jack stands.

Step 1 – Park your car on a level surface and apply parking brake.

Run your engine for 5 minutes before draining oil, as warm oil drains faster than cold. Do NOT drain oil that is at full operating temperature as it will be too hot to safely handle. Remove your keys from the ignition, as some hybrid models can auto-start. To be safe, always check your owner’s manual before working on a specialty vehicle.

Step 2 – Jack your car up and place it on jack stands.

A jack alone will not safely support the full weight of your car. Consult your manual for the proper jacking points. The placement of a jack stand is just as important as the jack placement. The wrong placement can damage your car’s suspension or body parts.

Step 3 – Locate the oil drain plug and place the drain pan below.

The oil drain plug is usually near the front center of the engine, but some vehicles have more than one plug. Check your manual for the exact location. Loosen the plug with a socket or wrench. Make sure that the drain pan is large enough to hold 4-5 quarts of oil or more. The oil drains at an angle, so position the drain pan to catch it.

Step 4 – Unscrew the plug by hand.

Remove the plug by hand. While unscrewing the plug, push it back towards the vehicle. This keeps oil from rushing out until you are ready to remove the plug from the hole.

Step 5 – Drain all oil.

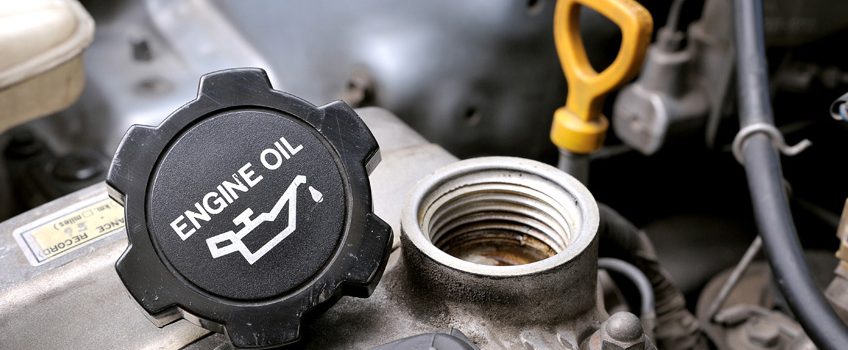
To speed up the draining process, remove the filler cap located on the top of the engine and allow air to enter from the top. Check your owner’s manual for the exact location.

Step 6 – Replace oil plug.

Tighten the oil plug by hand and ensure it is not cross-threaded. Once the plug is snug, finish tightening it with a wrench or by hand. Always use a new drain plug gasket and never over-tighten the drain plug.

Step 7 – Remove existing oil filter.

Place the oil pan underneath the old filter to catch any remaining oil while unscrewing it. Remove the old filter using an oil filter wrench. Use a rag to clean the mounting surface. Make sure that the sealing O-ring from the old filter is not stuck to the mounting surface on the engine. Note: Some vehicles use remote mounted oil filters that may be on top or on the side of the engine.

Step 8 – Lubricate new filter and screw into place by hand.

Lightly coat the rubber seal of the new filter with fresh oil. It’s usually not necessary to tighten the oil filter with the wrench. Refer to the filter’s instructions. Once the filter is installed, lower the car.

Step 9 – Clean the oil filter neck and pour in the new oil using a funnel.

Typically, you will use 4 to 5 quarts of oil, but check your manual for your vehicle’s oil capacity. Fill to three-quarters of the engine’s capacity to avoid overfilling, as there is always oil that does not drain. Then replace the cap.

Step 10 – Run the engine for a few minutes to make sure there are no leaks.

Check the area around the oil drain plug and the filter for any leaks. If you notice a leak, shut the engine off immediately and remedy any leaks. Check the dipstick afterward, and add more oil if necessary.

Step 11 – Dispose of the used oil properly.

Bring your used oil to a recycling center or a NAPA AUTO PARTS store to recycle it for you. These are the only acceptable methods for oil disposal.

IMPORTANT TIPS:

  • Read your owner’s manual or see your local NAPA AUTO PARTS store specialists to ensure you are using the correct type of oil and oil filter.
  • You’ll need to know the year, make, model and, in some cases, engine type of your car when you buy supplies. If you use our NAPA Know How App, you can scan your VIN so you’ll always have the information you need.
  • Make sure your car is securely supported. You will need two jack stands to support the front of your car after jacking it up.
  • Record the date and mileage after you change the oil so you will know when your car is due for another oil change. It helps to put a small sticker on your windshield to remind you.
  • Handle hot motor oil with extreme caution.
  • Use mechanic’s gloves to keep your hands protected and clean.
  • Only dispose of used motor oil and filters at authorized locations.
  • If you prefer to rely on a professional, your local NAPA AutoCare Center can change your vehicle’s oil for you.

on

How to Replace a Car Battery

Difficulty: Easy
Duration: 10-30 minutes
How often: Every 3-5 years

If you need to jump start your car in the morning, it might be time for a new battery. You can bring your car to a NAPA AutoCare Center for a new battery or you can change it yourself.

Changing a car battery is a relatively easy job that can be accomplished with only a few tools. However, some vehicles’ batteries are located in tough-to-service areas such as under the front fender, under the rear seat or in the trunk. If this is the case, consider having it changed at your local NAPA AutoCare Center.

Your battery supplies the electrical current necessary to start the engine. It also provides necessary power to the electrical components and accessories even when the vehicle’s engine isn’t running. The battery also acts as voltage stabilizer for the whole electrical system.

Things you’ll need from your garage or your local NAPA AUTO PARTS store:

  • New battery
  • Battery terminal cleaning brush
  • Proper tools to remove the battery terminals and hold-down
  • OBDII memory saver (optional, recommended for late-model cars)

Step 1 – Buy a replacement battery for your car.

You must know the make and model of your car to make the correct purchase. It also helps to know your battery’s BCI number. Car batteries come in different sizes, construction types, CCA (cold cranking amps) and amp-hour ratings. You want the replacement battery to match the original battery as closely as possible.

Step 2 – Locate the battery, typically under the hood.

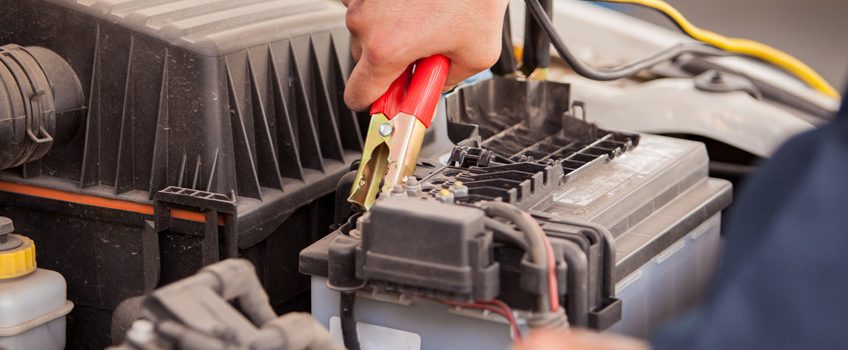
Identify the positive and negative terminals. Positive terminals are labeled with a “+” or color-coded red. Negative terminals are labeled with a “-” or color-coded black. Loosen the bolt that holds the negative terminal and remove the negative cable first. Next, remove the positive cable.

Step 3 – Unscrew the battery hold down clamp.

Lift the battery and remove it from the car. Inspect the battery terminal clamps. Clean or replace them if necessary.

Step 4 – Clean the battery tray.

Use plenty of fresh water or a mixture of baking soda and water. Wait for the terminal clamps and the battery tray to dry before installing the new battery.

Step 5 – Clean all corrosion from your battery.

Corrosion can be cleaned off using a stiff brush and a baking soda/water solution. After removing the corrosion, rinse off the battery with water. Clean the battery tray by wiping it out with moist paper towels and mild detergent. NAPA AUTO PARTS stores carry anti-corrosive battery spray. Use this to prevent future corrosion.

Step 6 – Place the new battery into the battery tray.

Make sure the positive and negative terminals are on the correct sides, and then install the battery hold-down. Reattach and tighten the positive cable first before reattaching the negative cable.

Step 7 – Start your car.

Verify that the installation is complete and the cables are securely attached to the battery posts. Gather your tools and close the hood of your car securely.

Step 8 – Dispose of the old battery properly.

Car batteries contain highly toxic material and cannot be thrown out with your garbage. You can dispose car batteries at your local NAPA AUTO PARTS store or NAPA AutoCare Center.

IMPORTANT TIPS:

  • Wear gloves whenever working with batteries and follow all safety precautions listed in your owner’s manual.
  • You’ll need to know the year, make, model and, in some cases, engine type of your car when you buy supplies. If you use our NAPA Know How App, you can scan your VIN so you’ll always have the information you need.
  • Your battery and charging system or alternator should be inspected at least once a year at your local NAPA AutoCare Center.
  • Neutralize any electrolyte spills or corrosion with a solution of baking soda and water.
  • Always remove the negative terminal first.
  • Protect your eyes with safety glasses when changing a car battery.
  • Never touch a metal tool across the battery terminals, or from the positive post to any other metal on the car. This will help prevent large sparks and damage.
  • Extinguish all smoking materials and open flames. Be cautious about creating any electrical sparks around the battery.

on

NAPA Brake Kit Buying Guide

NAPA Brakes Kits offer multiple pad and rotor combinations to provide safe, reliable, and confidence-inspiring stopping performance tailored to your driving needs. Based on decades of brake engineering experience, NAPA Brakes Kits include our technician recommended top-selling products for rotors and pads that can only be found at NAPA Auto Parts.

DISC BRAKE PADS OPTIONS

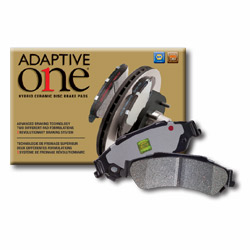
Adaptive One Friction Formula

∙Best in class technology for high demand brake torque applications and shortest stopping distances
Hybrid ceramic brake pad formulations minimize dust, eliminate noises, and reduce rotor wear
Improved rotor contact points for a smooth and consistent brake performance for the life of the pad
Long-lasting friction materials extend service intervals and are supported by a lifetime warranty
Installation hardware included for most applications

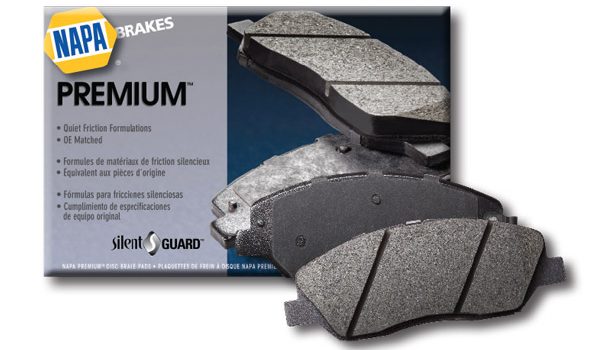
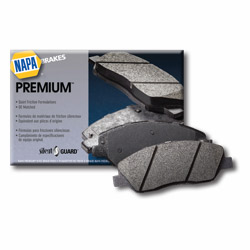
NAPA Premium Friction Formula

∙Better than Original Equipment stopping power for multi-passenger, hauling, and towing needs
Silent Guard multi-layer shims and anti-corrosive coatings prevent noise
Vehicle specific compounds maintain normal braking distances even during high-heat panic stops
Supported by a 24 month/unlimited mileage warranty
Installation hardware included for most applications

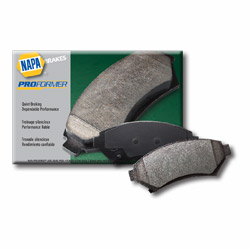
NAPA Proformer Friction Formula

∙Good replacement solution designed to meet Original Equipment specifications
Rubberized shims and pad material reduce noise and brake dust
Chamfered pad surfaces provide confident brake pedal feel
Features a 12 month/unlimited mileage warranty
Installation hardware included for some applications

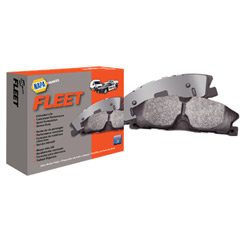
NAPA Fleet Friction Formula

∙Specialty severe-duty formula for everyday high-mileage stop and go usage
Retains normal braking performance even under sustained or extreme heat
Ideal for all-day use, pursuits, or hauling heavy cargo loads regularly
Noise free guarantee for the life of the pads
Installation hardware included for most applications

DISC BRAKE PADS OPTIONS

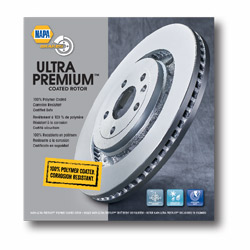
NAPA Ultra Premium Coated Rotors

∙Best choice for superior stopping power and vehicles exposed to road salt or wet conditions
Polymer coating prevents corrosion that can impact brake pedal feel and cooling characteristics
CNC machine finish and carbon alloy metals eliminate vibrations and extend rotor service life
NAPA Ultra Premium Coated Rotors are backed by a limited lifetime warranty

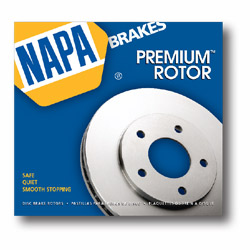
NAPA Premium Rotors

∙A good solution for all vehicles including applications that occasionally tow or carry heavy loads
Precision machined surfaces and exact rotor thickness provide consistent brake performance
Cooling vane configuration and carbon metallurgy prolong replacement intervals
NAPA Premium Rotors feature a 12 month/12,000 mile warranty

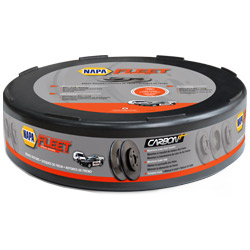
NAPA Fleet Rotors

∙Specialty rotor with proprietary metal alloys that increase strength and dissipates heat quickly
Exactly balanced for vibration free service for the life of the rotor
Optimized to be matched with NAPA Fleet brake pads for extended service intervals
Our most severe-duty rotor for outstanding performance and reliability