How to Replace an Accessory Drive Belt (Serpentine Belt)
Difficulty: Moderately difficult
Duration: May take several hours
How often: Every 60,000-100,000 miles, check owner’s manual
One out of every five vehicles on the road needs a new belt. Our NAPA Know How guide helps you through the steps necessary for proper diagnosis.
The introduction of ethylene propylene diene monomer (EPDM) belts in the late 1990’s have made wear detection harder than with the old neoprene belts. Still, there are indicators to look for that signal it’s time for a new belt.
Learn the signs of belt wear and how to save money on belt replacement below. If you’re confident in your ability to tackle this moderately difficult job, use this guide to help you do it properly. If you prefer to leave it to a professional, take your vehicle to your local NAPA AutoCare Center.
Make smart repair decisions. If your vehicle needs a drive belt accessory component like an alternator or water pump replaced, install a new belt at the same time. If you’re doing it yourself, you’ll save time. If you take it to the shop, chances are you will pay only for the belt and not the labor to install it.
Perform preventative maintenance. One way to make sure your belts are up to par is to schedule a belt replacement during a routine checkup. If a belt has 65,000 to 70,000 miles on it and your vehicle is already in the shop, go ahead and replace the belts. The technician should also check the condition of the automatic belt tensioner to ensure that the new belt is properly tensioned.
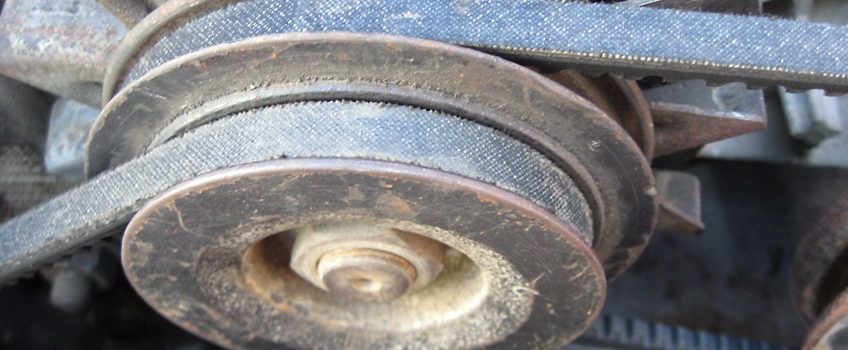
Inspect belts for wear. Some of the visual signs that indicate it’s time for belt replacement are abrasion/misalignment, cracking, glazing or pilling.
- Abrasion/misalignment: The nylon on your belt is essential. If there are any tears, they may cause misalignment and your belt won’t work properly. If the belt is misaligned and slipping, you will hear unusual noise or feel vibrations.
- Cracking: With Neoprene belts, it was common to look for three cracks in three inches, as a rule that the belt’s life was over and it needed to be replaced. The new EPDM belts are built to resist cracking, making it harder to notice wear at first glance. With EPDM belts, look for rubber loss that’s similar to how a tire wears out over time. The loss of just 5% of the belt material can cause the ribs of the belt to “bottom out” on the pulley(s). This accelerates belt wear and causes it to slip, which may affect the water pump, alternator or air conditioning compressor performance.
- Glazing: The belt is hard at work bending and flexing against a pulley, producing heat that causes its rubber to harden over time. If the belt gets loose, the added friction makes it hotter. This causes glazing and makes the belt slip more.
- Pilling: As your belt ages, it loses material that can build up in the belt grooves. This can contribute to a lack of tension, misalignment and worn pulleys.
Know the two major causes of belt failure: improper tension and misalignment. Vehicles using a single serpentine belt often use an automatic belt tensioning system. This system is designed to apply a constant force on a belt. The tensioner compensates for belt length changes due to wear or load changes within the system. The tensioner and associated pulleys should always be checked for wear when changing the belt. Tensioners normally fail at the same rate as belts fail.
STEP-BY-STEP INSTRUCTIONS:
- Mark the rotation direction on the belt.
- Unload the belt from the tensioner by rotating the tensioner.
- Remove the old tensioner from the engine (if the tensioner is being replaced).
- Install the new tensioner.
- Torque the mounting bolts to 1/3 installation torque in a star pattern.
- Retighten the bolts to 2/3 torque, then to full torque.
- Install the belt in the same direction as the old belt.
- Load the belt on the tensioner by rotating the tensioner as indicated (see rotate to load pointer).
- Tighten the belt until the pointer falls between the two marks.
- The gauge window, showing the maximum and minimum marks, is located on an area between the base and arm of the tensioner assembly.
More from Team Valvoline:
Car Belts and How They Work
When to Replace Your Serpentine Belt
IMPORTANT TIPS:
- The performance of your accessories is directly affected by the condition of your belts. Just a 5% loss of material can affect component performance.
- You’ll need to know the year, make, model and, in some cases, engine type of your car when you buy supplies. If you use our NAPA Know How App, you can scan your VIN so you’ll always have the information you need.
- Never use belt dressing or any type of substance to coat the belt. Contamination from applying a substance on the belt will adversely affect belt life.
- There are no serviceable parts inside a tensioner. The entire assembly must be replaced.
- When re-installing a belt, clean the pulley groves. Dirt or paint on the pulleys may cause belt noise.
- A belt failure affects the driveability of the vehicle, potentially leaving passengers stranded until a new belt is installed. Include belt replacement in your vehicle’s preventative maintenance schedule.


